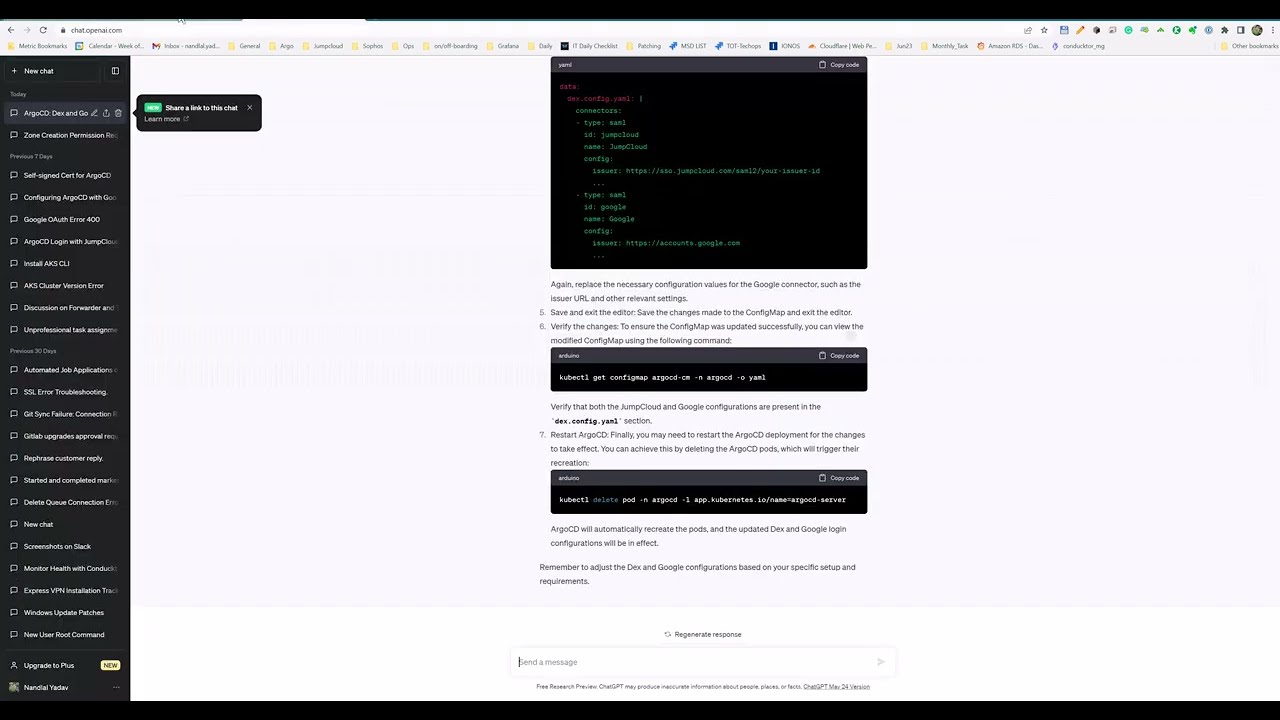
🔐 How to Configure Argo Login Using Google or JumpCloud | Step-by-Step Guide
October 15, 2026 — ny_wk
🛒 Buy / Check PriceDisclosure: some links above are affiliate links — if you buy through them I may earn a small commission at no extra cost to you. Thanks for supporting the channel!
As an Amazon Associate I earn from qualifying purchases.
Streamlining access to your Kubernetes applications is crucial for efficient DevOps. This comprehensive guide walks you through configuring Argo CD login with popular identity providers like Google and JumpCloud, enhancing security and user experience.
Managing access to your critical infrastructure, especially in a Kubernetes environment, can often be a complex undertaking. As organizations scale and adopt more sophisticated CI/CD pipelines, the need for robust, secure, and user-friendly authentication mechanisms becomes paramount. Argo CD, a declarative GitOps continuous delivery tool for Kubernetes, is a cornerstone for many teams. But how do you ensure seamless and secure login for your developers and operators without managing countless individual credentials?
This in-depth article will serve as your ultimate guide to configuring Argo CD login using two of the most popular and versatile identity providers (IdPs) available today: Google and JumpCloud. Whether your team primarily uses Google Workspace for identity management or relies on JumpCloud for a broader directory service, integrating these with Argo CD will significantly enhance your security posture, simplify user provisioning, and ultimately boost productivity. We'll dig into the step-by-step processes, highlight common pitfalls, and provide practical tips to ensure a smooth implementation, making your Argo CD authentication strategy robust and future-proof.
Understanding Argo CD Authentication Mechanisms
Before we dive into the configurations, it's essential to understand how Argo CD handles authentication. Argo CD supports various authentication methods, including built-in user management, client certificates, and external identity providers via OpenID Connect (OIDC). OIDC is a simple identity layer on top of the OAuth 2.0 protocol, allowing clients to verify the identity of the end-user based on the authentication performed by an authorization server, as well as to obtain basic profile information about the end-user in an interoperable and REST-like manner.
When you configure Argo CD to use an external OIDC provider like Google or JumpCloud, Argo CD delegates the authentication process to these providers. Users are redirected to the IdP's login page, authenticate themselves there, and upon successful authentication, the IdP sends an ID token back to Argo CD. This token contains user information, which Argo CD then uses to identify and authorize the user based on its RBAC (Role-Based Access Control) policies.
The primary benefit of using OIDC with an external IdP is centralized identity management. Instead of creating and managing separate users within Argo CD, you leverage your existing directory. This not only reduces administrative overhead but also improves security by ensuring consistent password policies, multi-factor authentication (MFA), and account lifecycle management are enforced at the IdP level.
Prerequisites for OIDC Configuration
- Running Argo CD Instance: You need an existing Argo CD installation within your Kubernetes cluster.
- Administrative Access: You must have administrative access to your Kubernetes cluster to modify Argo CD configurations (e.g.,
argocd-cm ConfigMap, argocd-secret Secret).
- Domain Name and TLS: Argo CD should be accessible via a public domain name (e.g.,
argocd.yourdomain.com) and have proper TLS/SSL certificates configured. This is crucial for secure communication with OIDC providers.
- Identity Provider Accounts: Administrator access to your Google Cloud Console or JumpCloud Admin Portal to create OAuth client credentials.
Configuring Argo CD Login with Google as an OIDC Provider
Integrating Google as your OIDC provider for Argo CD leverages your Google Workspace or personal Google accounts for authentication. This is an excellent choice for organizations already heavily invested in the Google ecosystem.
Step 1: Create an OAuth 2.0 Client ID in Google Cloud Console
Navigate to the Google Cloud Console.
- Select or create a project.
- Go to "APIs & Services" > "Credentials".
- Click "CREATE CREDENTIALS" > "OAuth client ID".
- Choose "Web application" as the application type.
- Provide a name for your OAuth client (e.g.,
argo-cd-oauth).
-
Under "Authorized JavaScript origins", add the base URL of your Argo CD instance:
https://argocd.yourdomain.com
-
Under "Authorized redirect URIs", add the Argo CD callback URL:
https://argocd.yourdomain.com/api/callback
- Click "CREATE".
- Note down your Client ID and Client Secret. These will be used in the Argo CD configuration.
Step 2: Configure Argo CD ConfigMap (argocd-cm)
Edit the argocd-cm ConfigMap in the namespace where Argo CD is deployed (typically argocd). You can do this with kubectl edit configmap argocd-cm -n argocd.
Add the following OIDC configuration under the data: section:
data:
  url: https://argocd.yourdomain.com
  oidc.config: |
    name: Google
    issuer: https://accounts.google.com
    clientID: YOUR_GOOGLE_CLIENT_ID
    clientSecret: $argocd.secret.oidc.google.clientSecret
    requestedScopes: ["openid", "profile", "email"]
- Replace
https://argocd.yourdomain.com with your actual Argo CD URL.
- Replace
YOUR_GOOGLE_CLIENT_ID with the Client ID you obtained from Google.
- The
clientSecret reference points to a secret that we'll create next.
requestedScopes defines the information Argo CD requests from Google after successful authentication.
Step 3: Store Client Secret in Argo CD Secret (argocd-secret)
The OIDC client secret should be stored securely in the argocd-secret Kubernetes Secret. If this secret doesn't exist, create it. Otherwise, add the secret key:
First, base64 encode your Google Client Secret:
echo -n "YOUR_GOOGLE_CLIENT_SECRET" | base64
Then, edit the argocd-secret:
kubectl edit secret argocd-secret -n argocd
Add the following under data::
data:
  oidc.google.clientSecret: BASE64_ENCODED_CLIENT_SECRET
Replace BASE64_ENCODED_CLIENT_SECRET with the base64 encoded string you generated.
Step 4: Configure RBAC for Google Users/Groups
After successful authentication, Argo CD needs to know what permissions the authenticated user should have. This is done through RBAC rules in the argocd-rbac-cm ConfigMap.
Edit the argocd-rbac-cm ConfigMap:
kubectl edit configmap argocd-rbac-cm -n argocd
Add RBAC rules under data:. For Google, the user's email is typically used for identification. For groups, you might need to configure Google Workspace to expose group information via OIDC or rely on external group synchronization tools.
Example for a single user:
data:
  policy.csv: |
    p, role:admin, applications, *, *, allow
    g, your_email@yourdomain.com, role:admin
Replace your_email@yourdomain.com with the actual Google email address. For more complex group-based access, you might need to explore advanced RBAC configurations with Google Groups or other IdP features.
Step 5: Restart Argo CD Server Pods
For the changes to take effect, restart the Argo CD API server and UI server pods:
kubectl rollout restart deployment argocd-server -n argocd
kubectl rollout restart deployment argocd-dex-server -n argocd # If dex is used for OIDC
After restarting, navigate to your Argo CD UI. You should now see a "LOGIN VIA GOOGLE" button. Click it, authenticate with your Google account, and you should be redirected back to Argo CD with your assigned roles.
Configuring Argo CD Login with JumpCloud as an OIDC Provider
JumpCloud offers a comprehensive directory-as-a-service solution, perfect for managing user identities across various platforms. Integrating JumpCloud with Argo CD provides a centralized identity management experience for your teams.
Step 1: Create an Application in JumpCloud Admin Portal
Log in to your JumpCloud Admin Portal.
- Go to "Applications" on the left navigation pane.
- Click the "Add Application" button.
- Search for "OpenID Connect" and select the "OpenID Connect" application type.
- Click "Configure".
-
General Info:
- Display Label: Argo CD
- Description: OpenID Connect for Argo CD
- Logo: (Optional) Upload an Argo CD logo.
-
SSO Tab:
- Client ID: This will be generated by JumpCloud automatically. Note it down.
- Client Secret: This will be generated by JumpCloud automatically. Note it down.
- Redirect URI: Add the Argo CD callback URL:
https://argocd.yourdomain.com/api/callback
- Login URL: (Optional, but good practice)
https://argocd.yourdomain.com
- Sign Key Type: RS256
-
User Groups: Assign the JumpCloud user groups that should have access to Argo CD. Only users in these groups will be able to log in.
- Click "Activate".
After activation, make sure to note down your Client ID and Client Secret from the "SSO" tab. Also, find your JumpCloud Organization ID. You can usually find this in your account settings or by inspecting the URL when logged into the admin portal (e.g., https://console.jumpcloud.com/customer/YOUR_ORG_ID/...).
Step 2: Configure Argo CD ConfigMap (argocd-cm)
Edit the argocd-cm ConfigMap in the Argo CD namespace:
kubectl edit configmap argocd-cm -n argocd
Add the following OIDC configuration under the data: section:
data:
  url: https://argocd.yourdomain.com
  oidc.config: |
    name: JumpCloud
    issuer: https://oauth.jumpcloud.com/oauth2/authz
    clientID: YOUR_JUMPCLOUD_CLIENT_ID
    clientSecret: $argocd.secret.oidc.jumpcloud.clientSecret
    requestedScopes: ["openid", "profile", "email"]
    # For group mapping, you might need to include a 'groups' scope if JumpCloud supports it
    # or rely on custom claims if configured in JumpCloud.
    # A custom claim mapping might look like:
    # requestedIDTokenClaims: {"groups": {"essential": true}}
    # You might need to configure this in JumpCloud's application settings as well.
    # The 'claim mapping' section in JumpCloud application configuration will be key.
- Replace
https://argocd.yourdomain.com with your actual Argo CD URL.
- Replace
YOUR_JUMPCLOUD_CLIENT_ID with the Client ID you obtained from JumpCloud.
- The
clientSecret reference points to a secret.
issuer for JumpCloud's OIDC endpoint is generally https://oauth.jumpcloud.com/oauth2/authz.
Step 3: Store Client Secret in Argo CD Secret (argocd-secret)
As with Google, the JumpCloud OIDC client secret needs to be stored in argocd-secret.
Base64 encode your JumpCloud Client Secret:
echo -n "YOUR_JUMPCLOUD_CLIENT_SECRET" | base64
Then, edit the argocd-secret:
kubectl edit secret argocd-secret -n argocd
Add the following under data::
data:
  oidc.jumpcloud.clientSecret: BASE64_ENCODED_CLIENT_SECRET
Replace BASE64_ENCODED_CLIENT_SECRET with the base64 encoded string.
Step 4: Configure RBAC for JumpCloud Users/Groups
RBAC for JumpCloud users works similarly to Google. The OIDC flow from JumpCloud will typically provide the user's email or username in the ID token. For group-based access, JumpCloud is particularly strong.
Edit the argocd-rbac-cm ConfigMap:
kubectl edit configmap argocd-rbac-cm -n argocd
To leverage groups from JumpCloud, you need to ensure JumpCloud sends group information in the ID token. In the JumpCloud OIDC application configuration, go to the "Claim Mapping" tab. You can map a JumpCloud attribute (e.g., groups, or a custom attribute) to an OIDC claim name (e.g., groups). Argo CD can then consume this claim.
Example RBAC with a groups claim:
data:
  oidc.claim.groups: groups # This tells Argo CD to look for a 'groups' claim in the ID token
  policy.csv: |
    p, role:admin, applications, *, *, allow
    g, JumpCloudAdmins, role:admin
    g, JumpCloudDevs, role:readonly
oidc.claim.groups: groups tells Argo CD to extract group names from the groups claim in the OIDC ID token.- Replace
JumpCloudAdmins and JumpCloudDevs with your actual JumpCloud group names.
Ensure that the group names configured in Argo CD's RBAC policy match the group names (or the values of the custom claim you configured) coming from JumpCloud's OIDC token.
Step 5: Restart Argo CD Server Pods
Apply the changes by restarting the necessary Argo CD pods:
kubectl rollout restart deployment argocd-server -n argocd
kubectl rollout restart deployment argocd-dex-server -n argocd
After restarting, go to your Argo CD UI. You should now see a "LOGIN VIA JUMPCLOUD" button. Authenticate with your JumpCloud credentials, and you should be granted access based on your assigned groups and roles.
Troubleshooting Common Issues
Even with a clear guide, configuration issues can arise. Here are some common problems and their solutions:
1. Redirect URI Mismatch
- Symptom: Error message like "Redirect URI mismatch" or "Invalid redirect_uri".
- Solution: Double-check that the "Authorized redirect URIs" in your Google Cloud Console or JumpCloud Application settings exactly matches
https://argocd.yourdomain.com/api/callback. It must include the /api/callback path and match the scheme (HTTPS) and domain.
2. Invalid Client ID or Client Secret
- Symptom: "Invalid client_id" or "Invalid client_secret" errors during login.
- Solution: Verify that the
clientID in argocd-cm and the clientSecret (base64 encoded) in argocd-secret are correct and exactly match what you obtained from Google or JumpCloud. Ensure no leading/trailing spaces.
3. Argo CD UI Not Showing Login Button
- Symptom: The OIDC login button (e.g., "LOGIN VIA GOOGLE") does not appear on the Argo CD login page.
- Solution: